It’s really important for you to give us the best Impression possible of your teeth, so we can get the right results for you.
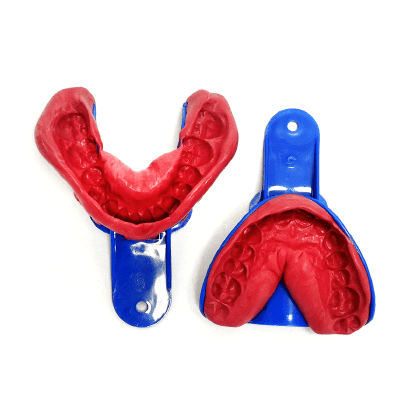
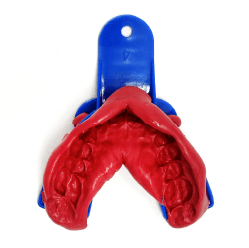
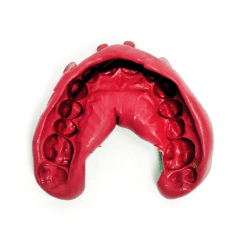
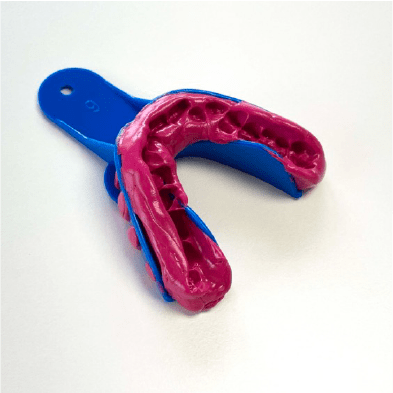
Here’s an example of how your Impressions should look when you’ve finished.
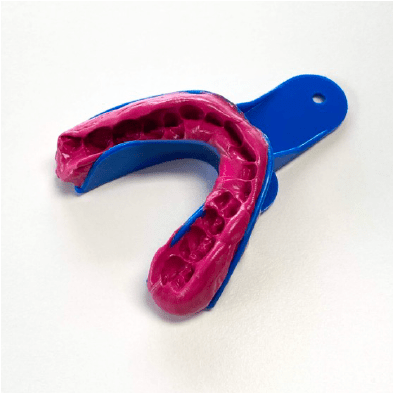
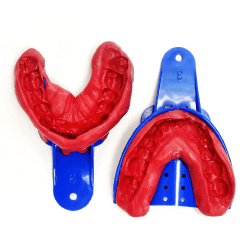
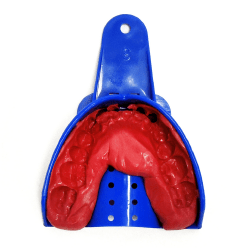
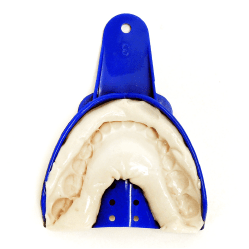
Check out what they shouldn’t look like below...
Lower tray used for upper teeth & upper tray used for lower teeth
Tray pushed too far back
Tray dragged along teeth

Wrong size tray - tray too small
Impressions taken out of their tray
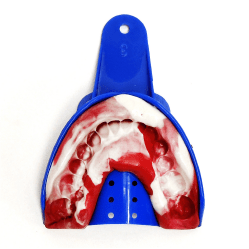
Putty not mixed properly - still showing white putty

Putty not mixed properly - no white putty used
Putty not mixed properly - no red putty used
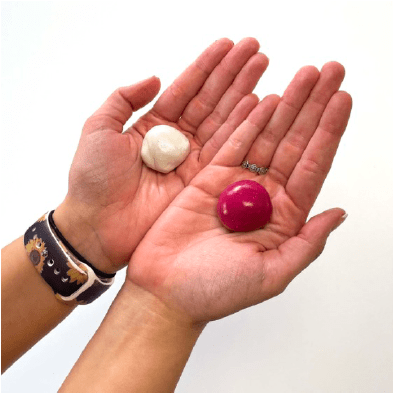
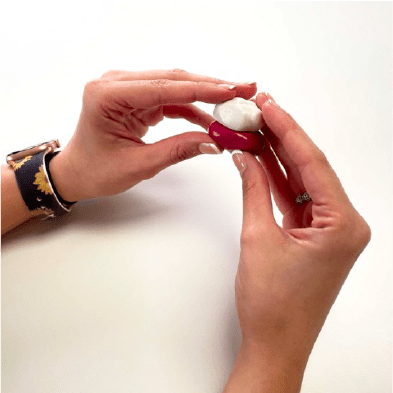
Take x1 white putty and x1 coloured putty, mix together in your hands until you have an even coloured putty. Choose the correct size Impression tray for upper and lower teeth. Ensure it does not pinch the side of your teeth. There should be room to move it slightly.
Note: Ensure your hands and teeth are clean. Rapidly Mix the colour BASE and white CATALYST putty (for no more than 50 seconds as it sets quick) together until they are mixed and uniform in colour.
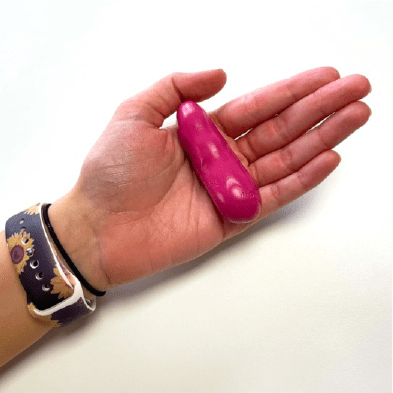
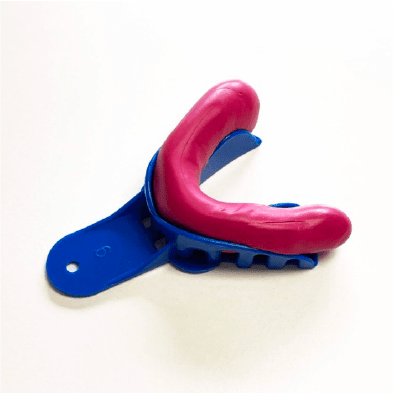
Roll the putty into a hot dog shape in between the palms of your hand. Place the rolled putty into one of the trays. Spread it evenly and thicker around the front, side and edges.
Should the putty harden too quickly we have provided a second set of BASE and CATALYST so you can try again.
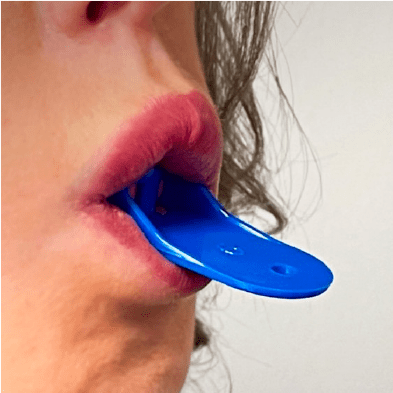
Relax and open your mouth. Place the tray with the putty inside your mouth and push up (upper impression) or push down (lower impression) firmly - once at the front, and once at each side and the back. Keep the impression still in your mouth - do not drag or move it. Leave in for 3 minutes.
Note: When tray is in place and covers teeth do not move it and do not hold by the tray handle. Make sure your top lip is over the tray when taking your Impression.
With great care remove and inspect the Impression for any defects.
Note: Check the inspection check list to ensure the Impression has been effective.
If there is a defect, then progress again with second set of Base and Catalyst putty and revert back to STEP 2.
Again, check the lower Impression against the inspection check list. If they pass, then progress to the instructions on the next panel.
Note: To ensure the best Impression are captured of your teeth please use all the putty that is provided in the kit and take two upper and lower Impressions.
Application:
This Impression kit can be used to make the following products; customised dental retainer, teeth whitening tray, mouth guard, anti-snoring device, teeth grinding guard etc.
Cautions:
Store in dry room temperature and avoid sunlight. Do not store in water or wet places.
Storage:
Store in dry room temperature and avoid sunlight. Do not store in water or wet places.